
Cedar Falls Epoxy Flooring has spent more than 20 years grinding and finishing polished concrete floors in Cedar Falls, IA, serving surrounding cities including Waterloo, Evansdale, Waverly, Independence and Oelwein. A polished floor is the slab itself, ground flat, hardened with a densifier and refined until it reflects light, with no coating on top to peel, chip or wear through.
That makes the concrete underneath matter more than it does with any coating. We look at what the slab is made of, what has been glued, painted or patched onto it over the years, and how it has cracked, then grind a test area where needed so you see the real look before the whole floor is committed.
Polished concrete works in retail spaces, offices, showrooms, warehouses and finished basements. We explain where it is the right choice, and where a coating would serve the room better, before you pay for a single pass of the grinder.
Commercial and Residential Polished Concrete Floors
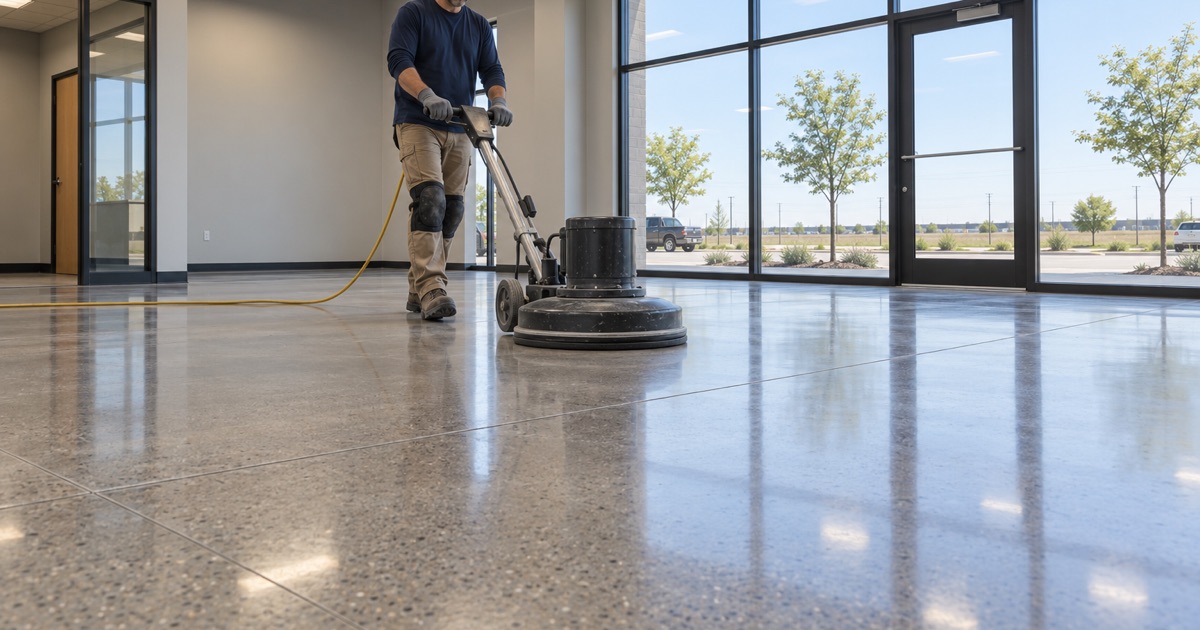
Retail, Office and Showroom Floors
In customer-facing spaces, a polished concrete floor gives a clean, modern look that holds up to heavy foot traffic and is simple to keep presentable. It reflects light, which brightens sales floors and offices, and there is no coating to scuff or peel at doorways.
We plan commercial polishing around opening hours, often working in sections or after close. Saw-cut lines, borders or a logo can be built into the grind sequence when the layout is decided early.
Warehouses, Plants and Distribution Floors
On large industrial slabs, grinding and densifying harden the surface and reduce the concrete dust that forklifts and pallet jacks grind loose from untreated floors. A lower sheen is common here, chosen for durability and easy cleaning rather than show.
We phase the work around racking, aisles and shifts so production keeps moving. Areas that see oil, coolant or chemical spills may be better coated, and we mark those zones separately.
Basements and Finished Lower Levels
In a finished basement, polished concrete gives a hard, easy-care floor that pairs well with area rugs and in-floor heat. It does not trap moisture under a film, which can make it a sensible choice on an older slab that would push a coating off.
Many older basements carry paint, black tile adhesive or patches, and those leave visible ghosts in a polish. We grind a test patch first so you can judge the look before going ahead.
Our Step-by-Step Polished Concrete Process
Step 1: Reading the Slab
We check the slab for cracks, patches, old coatings, sealers and soft spots, and note how flat it is. A slab that is too soft or too damaged may not polish well, and we say so rather than sell a finish that will disappoint.
Where existing coatings or adhesive are present, we plan how far the first grind needs to go to remove them completely. Leftover film or glue blocks the densifier from reaching the concrete, and those spots polish dull and blotchy next to clean slab, so getting the removal right at the start saves a second trip with coarse tooling.
Step 2: Grinding to the Aggregate You Choose
The first coarse diamond passes decide how much of the stone in the mix shows. A light grind leaves a cream finish with little aggregate, a medium grind gives a salt-and-pepper look, and a deep grind exposes the full stone.
Dust is captured at the grinder with a vacuum. Deeper grinds take more time and tooling, which is reflected in the quote. Because the stone is set in the slab when it is poured, the exposure you pick is permanent, so we show a sample at each depth on your own floor where the layout allows.
Step 3: Densifying With Lithium Silicate
Once the surface is opened, we apply a lithium silicate densifier that reacts with the concrete to harden the surface. It makes the top of the slab tougher, more abrasion resistant and better able to hold a polish. A densified floor sheds less dust under traffic and takes the later polishing passes more evenly, which is what gives the finish its depth.
Step 4: Polishing and Guarding
We work through progressively finer diamonds until the floor reaches the sheen you chose, then apply a penetrating guard that helps the surface resist stains. The final burnish brings up the clarity.
We then walk the floor with you and go over care instructions, including which cleaners to use and which to avoid. Acidic and citrus cleaners can etch a polished surface, and some degreasers leave a film that dulls it, so the first weeks of cleaning decide a lot about how the floor looks a year later.
What Decides How a Polished Floor Looks
Aggregate, Patches and the Slab’s History
Every slab is different, because the stone, sand and finishing of the original pour vary. Polished concrete shows that character, along with any patches, saw cuts and marks left by old walls or flooring.
We tell you up front what is likely to show, and the test area makes it concrete rather than a guess. On older Cedar Falls buildings, where a slab may have carried several floor coverings and a few remodels, that preview is the most useful thing we can offer before the full grind begins.
Cracks, Joints and Repairs
Cracks and control joints remain visible in a polished floor. We can fill them with a color-matched filler, but the repair will still read as a line in the finish.
Many owners like that honest look. If a seamless surface matters more, a coating or overlay may be the better fit, and we will explain the trade-off.
Choosing a Sheen Level
Sheen ranges from a low satin to a high-gloss mirror look. A higher sheen means more polishing passes and shows more reflection, while a lower sheen hides scuffs and grit more easily.
We help you choose based on traffic, lighting and how often the floor will be cleaned. A showroom with good daylight and a cleaning crew can carry a high gloss, while a busy back-of-house corridor or a basement playroom usually looks better for longer at a satin level.
Living With Polished Concrete in the Cedar Valley
Salt, Grit and Winter Entrances
Through a Cedar Valley winter, snow, salt and sand come in on every boot. Grit is what dulls a polish, and road salt left to dry leaves a white film on the surface.
Walk-off mats at entrances and regular dust-mopping keep the shine. We point out the doors that need them most before the job is finished.
Maintenance and Re-Burnishing
Polished concrete needs regular dust-mopping and damp-mopping with a neutral cleaner. In high-traffic areas, the sheen can be restored with periodic burnishing or a light re-polish.
That upkeep is far lighter than stripping and recoating a worn coating, which is a large part of why commercial owners choose polished floors. There is no wax to strip and no film to wear through in the traffic lanes, so the floor tends to age evenly rather than showing a dull path from the door to the counter.
When Another System Fits Better
Polished concrete is not the right choice for every room. In a wet commercial kitchen or a garage that takes road salt all winter, a sealed coating protects the slab better and is easier to keep sanitary.
We will tell you plainly when a coating, overlay or quartz system would serve the floor better than a polish. The same goes for a slab that is too soft, too cracked or too heavily patched to polish evenly, because a disappointing finish on a floor you walk across every day is not worth the savings.
- 20+ Years of Floor Work
- Moisture Test in Every Scope
- Free Written Estimates